Thursday, February 28, 2019

Daily 5 Tips & Tricks

Have you heard of or are interested in trying Daily 5 centers for your literacy block?  Quite honestly, I was SUPER-DEE-DUPER scared to try this when I had first heard of it many years ago.  Now, I would never go back to my traditional reading centers!  Why?  Because kids like the consistency of Daily 5 every day.  They know exactly what to do.  They know where all the materials are.  They know my expectations for them.  They feel confident in themselves.  And it makes them better readers and writers.

Before I switched to Daily 5 centers, I was constantly switching out my reading centers.  I used to stay after school to work every single Friday just so that my reading centers were ready to go for the next week's Monday centers.  Not anymore!  Woohoo!!!

Once I knew that I liked Daily 5 centers, I made different sets of task cards for my class.  I first introduced the task cards one set each 2-3 days.  With 5 task card sets, it took me about 2 weeks to introduce the cards, model how to complete good responses to the cards, and have the kids practice them.

What does the teacher do while the students are at their Daily 5 centers?  I conduct small guided reading groups.  I'm able to focus on my small group, and the kids are off rotating through their choices of INDEPENDENT, RIGOROUS, and MEANINGFUL Daily 5 centers.

So, are you ready to learn a few Daily 5 tips and tricks that I use in my classroom?  Here we go...

Let's start off with the basics:

  • Each of my students has a book box (or book baggy).  Inside their baggy is a reading strategy bookmark (that comes in this set).  The bookmarks have reading strategies with visuals on them.  Click on the picture for more info about the reading strategy bookmarks:


  • Each of my students also has at least 3 "just right" leveled books in their book box.  The kids can have a maximum of up to 6 books in their book boxes (though they can change them out weekly so that they don't get bored).  
  • Students also have a pencil and a reading journal inside their book box.  This is where the students write their responses to the Daily 5 task cards.  For my kiddos, each student has a composition book as their reading journal.  The pages don't rip out, and they're super cheap during back to school sales before the school year begins!


Now let's talk about the 5 Daily 5 centers.


1.  WORD WORK
There are 35 EDITABLE word work task cards.  The students have differentiated spelling word lists that I post on the board each week.  This takes me less than a minute to write on the board on a weekly basis!  Woo hoo!!!  I use sight words as their spelling words, though you can choose to use whatever spelling words you'd like.  When I say differentiated, I mean different word lists for different kids.  My purple group might be working on "words with suffixes or prefixes," my  blue group might be working on "primer words," and my red group might be working on "pre-primer words."

The students know what color words they are supposed to complete because their name is written in that same color marker on my centers chart.  Now that the students know which words they will be working on, they can grab a WORD WORK TASK CARD.  The kids simply need to follow the directions listed on the card.  Easy peasy, lemon squeezy.  They show their work in their reading journal (composition notebook).  After they finish that task card, they grab another card.  The cycle continues until time is up.

TIP:  Have a word work supply station in your classroom with different tiny baskets or tubs so that your kids will always know where to get supplies to complete the word work task cards.  Examples of things to keep inside baskets/tubs:

  • markers
  • colored pencils
  • crayons
  • magnetic letters & cookie sheets
  • magnetic tiles & cookie sheets
  • dry erase markers & dry erase boards
  • stampers
  • playdough
  • letter beads & pipe cleaners
  • magazines (so that kids can cut out letters to make words)

As you can see in the picture above, the task card set comes with center directions.  Most of the word work task cards also have examples on them (for kiddos who might not know how to read very well.)  Click on the picture below for more info:
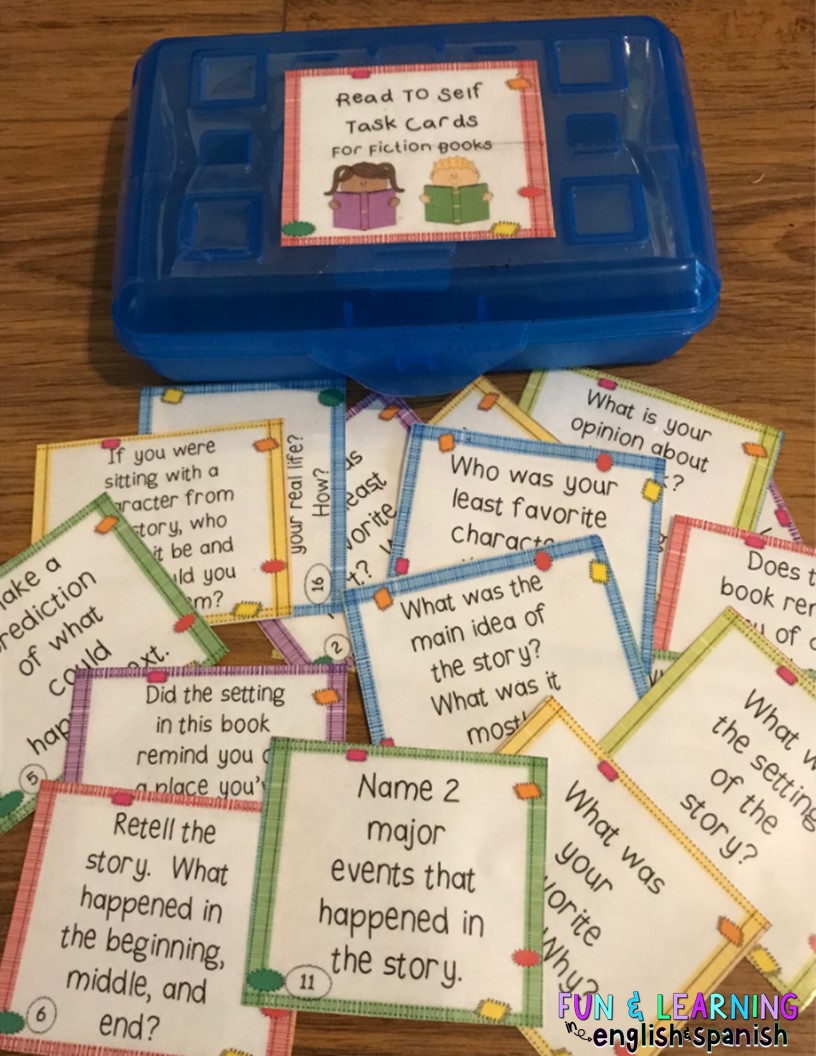
2.  READ TO SELF
There are 28 EDITABLE read to self task cards (17 task cards for fiction books and 11 task cards for nonfiction books).  For this set of task cards, I actually separated them into 2 sections for you.  One section of cards is for fiction books, while the other section is for nonfiction books.  Because of that, I actually put them into 2 separate baskets (or pencil boxes).  One has the title "for fiction books" and the other says "for nonfiction books."  See pictures below:

The students grab their book box, reading journal, and a READ TO SELF TASK CARD from the "read to self" basket.  First, the student will read the book.  Then the student will respond to the task card in his reading journal.
After the student writes the response to the task card, now he can illustrate his page to match his words.
TIP:  Teach your students to write "I read ____________" (title of book) before responding to the task card.  That way, when you look over their reading journal (or kids are reading their own reading journals on a different date), everyone will know which book the student was responding to.  See my example in the picture above.

TIP:  I teach my students to always write their reading response in their reading journal BEFORE illustrating.  A few reasons:

  • Some students write very big.  If they draw first, they might not have enough room to write their reading response.
  • Some students like to write a lot of details.  If they draw first, they might not have enough room to write all of their thoughts and details.
  • Some students are future Vincent Van Goghs.  They love to draw and color.  If you allow them to draw first, they might not have time to write their reading response.  (However, this is not always the case.  Teachers, you all know your students the best.  You may have some students that need to get their creative juices flowing by drawing first and then writing...it's up to your discretion.)

Once a student is done responding to that task card, he can either get another task card and complete it about the same book, or he can read a different book and respond to a different task card in his reading journal.  This cycle continues until time is up.

Just like all other task card sets I've made, this task card set comes with center directions.  Click on the picture below for more info:

3.  BUDDY READING
There are 28 EDITABLE buddy reading task cards (17 task cards for fiction books and 11 task cards for nonfiction books).  For this set of task cards, I actually separated them into 2 sections for you.  One section of cards is for fiction book, while the other section is for nonfiction books.  Because of that, I actually put them into 2 separate baskets (or pencil boxes).  One has the title "for fiction books" and the other says "for nonfiction books.)  See pictures below:

The students grab their book box, reading journal, and a BUDDY READING TASK CARD from the "buddy reading" basket.

TIP:  Be sure to model how students should buddy read together.  They should be able to help each other read their books.  They should be close enough to talk to each other about their books without having to yell.  At the beginning of the entire school year, during the first week of school, I teach and model how to buddy read.  Elbow to elbow, knee to knee.  I found this cute chart somewhere on TeachersPayTeachers, though I forgot which store I found it at.  Sorry!  The good thing, though, is that I DO have the "elbow to elbow, knee to knee" directions listed on the buddy reading task card center directions (as shown in the basket picture above.)
For this center, students should be paired up in groups of 2.  Each student has his own book box.  The team of 2 students will share 1 buddy reading task card.

Student 1 will take out 1 book to read to his partner.  Student 2 should have NOTHING in his hands.  Student 2's book box should be on the floor beside him.  Now, they're ready to buddy read.
Student 1 will read a book aloud to Student 2.  If Student 1 has trouble decoding a word, Student 2 can help!  Besides...what are buddies for?!

After Student 1 is done reading the book aloud to Student 2, now they read the buddy reading task card that they are sharing.  They TALK about their response to the card.  After they are done talking about their response to the buddy reading task card, now it's Student 2's turn to read a book aloud to Student 1.  Repeat as before.  Student 2 reads the book aloud to Student 1.  If Student 2 has trouble decoding a word, Student 1 can help!  Then they grab another buddy reading task card and talk about their response to the card.    This cycle continues until time is up.

TIP:  For this center, I do NOT usually have the kids write their responses in their reading journals.  Though, you CAN choose to have your students write them down.  It's really up to you.  The reason I don't do that is because these are still young kiddos.  They're still learning a lot about language, how to interact with peers, appropriate ways to discuss books with peers, etc.  My students get tons of time to practice reading and writing during the other four Daily 5 centers, so I use this buddy reading center as a way for the kids to practice oral language skills.

Just like all other task card sets I've made, this task card set comes with center directions.  Click on the picture below for more info:

4.  LISTEN TO READING
There are 22 EDITABLE listen to reading task cards.  I'm fortunate enough to have 5 Ipads and 5 Chromebooks for my class, so I have more than enough technology devices for the kids to use.  However, many years ago, I wasn't so lucky.  I still made it work, though.  When I first started using these task cards, I had 4 students hook up their headphones to a splitter that was connected to 1 cd player.  The students would take turns flipping the pages of the book and they would all listen to the same book at the same time.  When they were finished listening to the book, the kids would each get a task card and write their own reading response to their task card at their own desks.  It worked out just fine!

For those of you who have at least 2-3 technology devices for students in your classroom, it'll be a lot easier:)  The students grab their technology device, reading journal, and a LISTEN TO READING TASK CARD from the "listen to reading" basket.  First, the student will listen to a book, then the student will respond to the task card in their reading journal.  (See the example above from the read to self task card set.)  After the student writes the response to the task card, now they can illustrate their page to match their words.

Once a student is done responding to that task card, he can either get another task card and complete it about the same book, or he can listen to a different book and respond to a different task card in his reading journal.  This cycle continues until time is up.

TIP:  Make sure that your students plug the headphones in ALL.THE.WAY.  Trust me on this one.  If you don't have them practice plugging them in all the way, the room will get loud very, very quickly!

TIP:  Make sure your students know the computer login information.  I usually have it posted all over the room.  I also have each individual students' login information taped onto their desk for easy access.  You definitely don't want your kiddos to waste instructional time looking around the room for login information, ya know?

Just like all other task card sets I've made, this task card set comes with center directions.  Click on the picture below for more info:

5.  WORK ON WRITING
There are 23 EDITABLE work on writing task cards.  For this center, you can choose where you want your kids to respond to the task cards.  I give the students a choice of different kinds of paper from my writing center, or you could choose to have them write it in their reading journal.  Different kinds of paper might include:  single-lined paper, primary-lined paper, blank white paper, construction paper, notebook filler paper, etc.  The PRO to using different kinds of paper is that the students like choices...and also, you can easily grab this paper and frame it (or highlight it as your writer of the week work).  The PRO to having the students write their response to the work on writing task card in their reading journal is that the students are already used to grabbing their reading journal each and every single day during Daily 5 center time (since that's where they respond to the other 4 task card sets.)

Once the student knows where he will write (paper or reading journal,) now they can get a WORK ON WRITING TASK CARD from the "work on writing" basket.  First, the student will read the card.  Then the student will do what the card asks him to do.  After they are done writing, now they can illustrate their page to match their words.

TIP:  If you are going to give your students different choices of writing papers, buy some cheap stackable trays and put different papers in each tray.  Keep all of the different papers in a writing center so that your students will always know where to get writing paper to complete these task cards.

Once a student is done responding to his first task card, he can either get another task card or add more details to his words and/or pictures from the existing writing.  This cycle continues until time is up.

Just like all other task card sets I've made, this task card set comes with center directions.  Click on the picture below for more info:

A FEW MORE TIPS:

  • During those first 2 weeks when you're modeling how to grab a task card and where to respond to it (reading journal most of the time), MODEL closing your eyes and NOT LOOKING at which card you chose.  You get what you get and you don't get upset!  Believe me, I've tried allowing the kids to read through every task card and find a good one that they might like the best, but by the time they do that, reading center time will already be over!  My students know that you BLINDLY CHOOSE ONE CARD and complete it.  If they have extra time left over after completing that task card, then they are able to find their favorite one and complete it as an extra task card.
  • Laminate the cards!!!  You're going to love using them year after year.  The students get a lot of literacy practice with them and they use them daily.  You definitely don't want them to rip!


WHERE DO I STORE THESE TASK CARDS?
Now, you might be wondering...where do I store all of these task cards?  What should I do with them?

You can store them in baskets (I taped the directions page to the inside of the basket.)  Then just lay out all of the cards inside the basket.
OR...


You can store them in pencil boxes (I taped the task card cover to the front of the pencil box so that kids know which cards are inside each pencil box).  Then just put the task cards inside the pencil box.
OR...
You can also hole-punch them and put them on binder rings.  I don't have a picture of that because I don't suggest it.  If you put them on binder rings, only one student will be able to have the whole set of task cards at a time.  That would mean that you would need to print at least 5-6 whole sets, and I mean...who has the money to pay to print 6 colored sets of the same task cards.  Let's do some math... 6 copies of 1 set of task cards, multiplied by 5 sets of task cards, equals out to 30 sets of task cards.  😮 No way!  Too expensive! (Or am I just cheap?  haha)

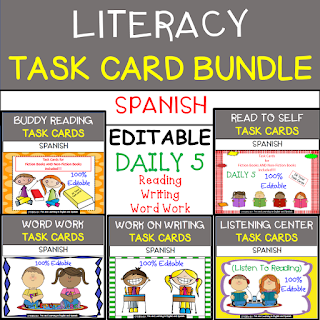
One last thing...did I mention that I speak, read, and write Spanish fluently?!  Yep!  I also offer all of these task cards in SPANISH!  See below:

Click on each picture for more info about each EDITABLE set (or save some $$$ and get the whole bundle):


That's all I have for you today.  I hope you were able to find something useful!

Bye for now😃


Tuesday, February 19, 2019

Super Writing Skills

By this time in the school year, I've instilled a love of writing in my students.  They absolutely LOVE to write stories!  They write about being super heroes, how they love to play at the park, their family, and so much more!  I often times take their writing for a grade.  My school doesn't do A, B, C, and F grades for K-2 classes.  For Kindergarten, 1st grade, and 2nd grade, the students' work is graded as E, S, N , and U.
E - Exceptional
S - Satisfactory
N - Needs Improvement
U - Unsatisfactory
This can be quite confusing for the kids.  So I made this SUPER WRITING chart so that the students can compare their own writing to the Super Writing chart.
It is SO IMPORTANT TO MODEL GOOD WRITING SKILLS for the students.  In the picture above, the kids can clearly see the difference in their writing.  Believe me, the students refer to this chart ALL- THE- TIME!!!  It has helped my students improve their writing tremendously!

Speaking of writing, my students each also have this writing folder at their desk.  It has 45 pages of writing charts that help the students develop good writing skills.  I give this to the students at the beginning of the school year, but you can give it to kids anytime you want. Click on the picture for more info about the writing folder.
Do your kids ever say "I don't know what to write about."  My students say this all the time, so I ask them to refer to their writing folder.  Whenever they come to school and tell me about an awesome activity that they did over the weekend, I tell them to write it in their "ideas to write about" page in their writing folder. Whenever they say they have nothing to write about, they can refer to this "ideas to write about" page and write about them.  See the pages below that are included in the writing folder packet listed above.  Click on the picture for more info about the writing folder.
Do your kids ever ask "How do you spell -------?" My students ask me that question at least 100 times every day.  Seriously.  OMG!  My answer is always to "look in your writing folder."  There are TONS of pages of common words that students need to spell in their writing.  It has TONS of sight words, blends, digraphs, word banks for animal words, numbers, days of the week, people words (mom, dad, brother, sister, cousin etc.), color words, food words, and much more.  Click on the picture for more info about the writing folder.

Do your students ever say "I'm done.  Now what should I do?"  My answer again is to refer to their writing folder.  Before they can start a new story, they need to refer to the "Revise vs Edit" page in their writing folder.  

When you revise your story, think...ARMS:
  • A - Add sentences and details to your story
  • R - Remove unneeded words and sentences ----make sure that you are sticking to your topic and not writing about something that's unrelated to the story
  • M - Move or change a sentence or word placement...maybe something you wrote on the 3rd page actually would make better sense in a different part of your story
  • S - Substitute or trade words or sentences for more exciting ones

When you are editing your story, think...CUPS:
  • C - Capitalization - Make sure that you have correct capitalization in your story.  Names of places and people, months of the year, days of the week, titles, the pronoun I, etc....should all start with a capital letter.
  • U -Understanding - Make sure that a reader can understand what you wrote.  Did you add finger spaces between words?  Did you use your best handwriting?  Did you make sure that your nouns and verbs match correctly?  
    • Ex: My dogs runs fast. - "Dogs" is plural so the verb should be "run" and not "runs."
  • P - Punctuation - Does your story have correct punctuation? If it's a telling sentence, it needs a period.  If it's an asking sentence, it needs a question mark.  If it's a yelling or exciting sentence, it needs an exclamation mark.
  • S - Spelling - Did you check your spelling?  Refer to the writing folder to look for the spelling of how to write sight words and other common words like in the pages shown above.  Word wall words should also be spelled correctly. 
Click on the picture for more info about the writing folder.


Okay, so the students have revised and edited their stories.  This time, "I'm Done. Now What?" actually holds true.  The students are done writing.  Now what?  Oh, no!  Your writing block still has time left over!  Don't stress...the kids can again refer to their writing folder (shown above) for ideas of what do do.  
  • Read your story again.
  • Add details to your picture.  (Look at the picture below...the student added a cloud, a tree, and a ball bouncing to the dog.)
  • Add details to your writing.  (Look at the picture below...the student added the detail "like to play with" dogs...instead of simply writing "I like dogs."
  • Write a new story about a new topic.

That's all I have for today.  I hope I was able to help in some way!  Bye for now😃


Tuesday, February 12, 2019

What's in my Teacher Bag?


Everywhere I go, I take my teacher bag with me.  When I say everywhere, I mean EVERYWHERE.  I take this to grade level meetings, faculty staff meetings, IEP/SST meetings, etc.  Needless to say, I also take this home with me daily and back to work daily.  If you're a new teacher, or if you're a teacher who simply needs a little help organizing yourself, you may find a good tip or two in this blog post. (Can you tell I'm a HUGE Wisconsin Badgers fan?! haha)

1 - Binder Cover (editable)
I made this cute binder cover just in case I'm in a "spacy" mood someday.  By that, I mean...if I accidentally leave this binder in someone's meeting room, then they'll know who it belongs to...me!  Unfortunately, I do this quite often...perhaps I try to multi-task a little too much sometimes.  haha!  Click on the picture above to get the link to these cute (and EDITABLE) binder covers.

2 - Supply Bag
In my supply bag, I keep tons of office supplies that I might need during one of my many teacher meetings (or at home while I'm grading papers, cutting out center materials, etc.)  I got mine for $1 at Dollar Tree, but you can find these anywhere.  Here's a quick list of what I keep in the bag:

  • Pencils (mechanical pencils for myself - in case I need to jot down notes during a meeting)
  • Colored pens (for grading papers)
  • Sticky notes (to write myself reminders that I may need to jot down during a meeting)
  • Highlighter (to highlight important info given to me during a meeting)
  • Paperclips (because ya never know)
  • Binder clip (because ya never know)
  • Permanent marker (because ya never know)
  • Glue stick (in case I'm working on making math or literacy centers at home)
  • Scissors (in case I take home laminated math or literacy center materials that need to be cut out)

3 - Grade Level Pacing Guide
I often write lesson plans at home either on weekday evenings or on the weekend.  I also try to find center ideas and educational resources that match up with what I'm teaching.  In order to do so effectively, I keep the grade level pacing guide in my planning binder.  That helps me remember what types of resources I need to find and/or make.

4 - Common Core Standards Cheat Sheets for ELA & Math
I also keep a list of common care standards for all subject areas in my planning binder.  I do this because my school administrators require that I write down the common core standards that are aligned with what I'm teaching every week.  We are required to post our weekly lesson plans online along with a list of common core standards that match up with my daily lesson plans.  By keeping this in my planning binder, I'm quickly able to find what I need.  I found these cute and FREE common core standards cheat sheets for K-5 on TPT.  Please note that I did not make these sheets.  They are located on a different store's TPT.  The links are below:


5 - Georgia Science and Social Studies Standards

In order to help me find resources for specific science and/or social studies standards, I also keep those handy in my planning binder.  I currently teach in Georgia, so I'll post the links to the GA standards below:


6 - Dolch Words List
I like to keep a list of Dolch words by level in my planning binder.  I do that because I write the differentiated spellings words on the board each Monday.  I have 3 levels for reading center groups.  These reading center groups are NOT the same as my guided reading groups.  For center groups, I have 1-lower level readers, 2-on grade level readers, and 3-higher level readers.  I write down the spellings words for each center level group every Monday on the board.  My level 1 readers will have to practice spelling/reading/writing the RED words that are on the board.  My level 2 readers will do the same with the BLUE words, and my level 3 readers will do the same with the PURPLE words that are on the board.  In the picture below, you can see that I write R (red), B (blue), or P (purple) so that I remember which group practiced which words during word work time, morning work, etc.
This may sound a little confusing, so I'll write another post about how I do differentiated centers soon.  In the meantime, just know that I keep this list on hand for when I write lesson plans.  This Dolch list of words is part of a larger resource that I made for my kiddos.  Click on the picture below to learn more about it:

7 - Class Schedule
While writing lesson plans, I also jot down the time/subject.  Speaking of lesson plans, click on the picture below to learn more about my differentiated lesson plan template:
8 - Class Specials Rotation Schedule
I keep the class specials rotation schedule in my planning binder as well.  My school has more 2nd grade classes than it does specials classes.  So, we rotate through the different specials classes every few days.  I keep this handy in case a parent emails me asking which specials class we have the next school day.

9 - Grades Needed
Each school district requires different grades for different teaching standards.  It also changes depending on which grade level you're teaching.  I keep the list of grades needed per quarter in my planning binder to help me when I'm writing lesson plans, making centers, or thinking of assessments to give my students.

10 - Grades Calculation Helper
I bought this handy dandy grading chart at Dollar Tree many, many years ago.  It comes in SUPER handy when I'm grading multiple choice type assessments and need to quickly find out what percentage the student worked out correctly/incorrectly.  Yep, I take LOTS of papers home to grade.  Fun times.  Fun times.  haha

11 - Volunteers Needed Sheet
Whenever I'm at home and think of something that a parent can help me with, I simply look at my stapled volunteer sheets that I keep in my planning binder.  I passed these "Volunteers Needed" sheets out to my students' parents at the beginning of the year.  I received about 15 back, which is really good!  I love it when I get a class full of hands-on parents! 

Here's an example of when I needed the volunteer sheets in the past:  I stayed late at school to laminate resources to use as upcoming math and literacy centers.  I simply pulled out a volunteer sheet and put the laminated resources (along with a sweet "thank you" note and goody) into a large ziploc bag for the parent volunteer.  I also put a sticky note with directions of what to do with the laminated resources in the large ziploc bag.  I'll then sent home the ziploc bag with a student the next school day.  The parents cut out the center resources (or stapled together student booklets, etc.) and sent it back to school with their child.  If you look closely at the picture above, I also wrote down a date on the top left corner to remind me that that specific parent already helped by volunteering to do something on such date.  This helps me spread out the help among all of the different parent volunteers that returned the volunteer forms to me.  Click on the picture below to get the volunteer form FREEBIE:

12 - Loose Leaf Paper
I keep a couple sheets of loose leaf paper in my planning binder just in case I need to jot down notes from one of my many meetings that I attend at school.

13 - CAFE Boards (reading strategy cards)
While writing lesson plans, I also like to add "CAFE Board reading strategies" that the kiddos can use to help them with their literacy skills.   I'll write a separate post specifically about CAFE reading strategies soon.  The kids love these CAFE cards and refer to them throughout the school year.  
I offer CAFE Boards for Kindergarten, 1st grade, or 2nd grade, and I also offer them in SpanishClick on any of the pictures below for more information:


That's all I have for now.  I hope I was able to help give you a tip or two!  Bye for now😃